


Karibu. We all know the frustration of stepping into a shower that feels less than clean. You see the cloudy film on the glass doors, the dark lines between the tiles, and the hard water crust forming on the showerhead. Cleaning the bathroom often feels like a heavy, repetitive task that never truly ends. You spend hours scrubbing, but the grime returns a few days later.
You do not need to struggle with endless scrubbing. Professional cleaners use specific chemical principles and a structured order of operations to clean bathrooms efficiently. By understanding how different cleaning agents react to specific types of dirt, you can permanently remove stubborn marks and protect your surfaces. This guide provides the exact steps you need to banish soap scum, restore your grout, and maintain a spotless shower with minimal physical effort.
Understanding the Chemistry of Bathroom Dirt
Before you start cleaning, you must understand exactly what you are trying to remove. Bathrooms accumulate three distinct types of dirt. Each type requires a completely different chemical approach.
The first type is soap scum. This forms when the fatty acids in your bar soap mix with the calcium and magnesium in your tap water. It creates a hard, waxy layer that binds tightly to glass and tile.
The second type is mineral scale. Hard water leaves behind white, chalky deposits of calcium carbonate on your metal fixtures and showerheads.
The third type is organic matter. This includes mold, mildew, body oils, and skin cells. These elements feed on the moisture in your bathroom and embed themselves into porous surfaces like grout and caulking.
Applying a basic all-purpose cleaner to these surfaces will fail. You need the right tool for the exact chemical makeup of the dirt.
Gathering Your Deep Cleaning Toolkit
You need professional-grade tools to achieve professional results. Throw away your old, worn-out sponges. They hold bacteria and lack the physical structure to remove hard buildup. Assemble the following items before you begin your deep clean.
Essential Cleaning Agents
You need three specific liquids in your cleaning kit.
-
An Acidic Cleaner: You need an acid to break down mineral scale and hard water stains. Standard white vinegar contains 5 percent acetic acid and works perfectly for light buildup. For heavy calcium deposits, you need a commercial descaling product containing phosphoric acid.
-
An Alkaline Cleaner: You need a high-pH alkaline solution to break down organic matter and body oils. Heavy-duty degreasers or dedicated grout cleaners work best for this task.
-
A Disinfectant: You need a product that kills mold spores and bacteria. Hydrogen peroxide or a diluted bleach solution works well. You must never mix bleach with vinegar or ammonia. Mixing these chemicals creates highly toxic gas. Use them completely separately.
The Right Tools for the Job
Your physical tools are just as important as your liquids.
-
Microfiber Cloths: Buy a pack of high-quality microfiber cloths. They have microscopic fibers that grab dirt and hold it, rather than just pushing it around the surface.
-
A Stiff Grout Brush: Do not use an old toothbrush. A toothbrush is too soft. Buy a dedicated grout brush with stiff, V-shaped nylon bristles. The V-shape allows the bristles to reach deep into the narrow lines between your tiles.
-
A Quality Squeegee: A squeegee with a fresh, flexible rubber blade is the most important tool for maintaining your glass doors.
-
Non-Abrasive Scrub Pads: You need textured pads that will not scratch your acrylic bathtub or your glass doors. Look for white or blue nylon pads. Avoid green or heavy-duty dark pads, as they will leave permanent scratches on delicate surfaces.
Banishing Stubborn Soap Scum
Soap scum requires a two-step process. You must first break down the waxy structure, and then you must apply physical friction to lift it away.
Glass Shower Doors
Glass shower doors show soap scum immediately. The cloudy film blocks light and makes the entire bathroom look dirty.
Fill a spray bottle with a mixture of half white vinegar and half warm water. Add one teaspoon of liquid dish soap. The dish soap helps the mixture stick to the vertical glass instead of running straight down to the floor. Spray the entire glass door generously. You must let the solution sit for exactly 15 minutes. The acid needs this time to dissolve the calcium bonds in the soap scum.
After 15 minutes, take your non-abrasive scrub pad and scrub the glass using small, circular motions. The soap scum will turn into a soft paste. Rinse the glass thoroughly with hot water. Take your squeegee and pull the water down the glass in straight, overlapping lines. Wipe the rubber blade with a dry microfiber cloth after every single pass. This prevents streaks and leaves the glass perfectly clear.
Bathtubs and Acrylic Surfaces
Acrylic bathtubs require gentle handling. Abrasive scouring powders will create thousands of microscopic scratches on the surface. These scratches will trap body oils and turn the bathtub permanently gray.
To clean an acrylic tub, create a paste using baking soda and a small amount of water. Spread the paste over the heavy soap scum rings along the sides of the tub. Spray your vinegar and water solution over the paste. The mixture will bubble heavily. Wait 10 minutes. Use a soft microfiber cloth or a white nylon pad to wipe away the paste and the dissolved soap scum. Rinse the tub completely with warm water.
Restoring Grout to Its Original Color
Grout is highly porous. It absorbs water, soap, and dirt every time you use the shower. Over time, the grout lines turn dark brown or black. Restoring your grout requires an alkaline cleaner to pull the embedded oils out of the porous material.
The Cleaning Process
Ensure the shower is completely dry before you start. If you spray cleaner onto wet grout, the water inside the grout will dilute the chemical and render it useless.
Apply your alkaline grout cleaner directly to the grout lines. Let it sit for 10 to 15 minutes. Take your stiff V-shaped grout brush and scrub the lines vigorously. Apply firm, downward pressure. You will see the dark dirt lift out of the pores and mix with the liquid.
Rinse the wall with hot water immediately. If you let the dirty liquid dry on the wall, the grout will simply absorb the dirt again. Use a wet vacuum or a highly absorbent towel to remove the dirty water from the floor of the shower.
Tackling Mold and Mildew
If your grout has black spots that refuse to scrub away, you have a mold issue. Mold sends roots deep into the silicone caulking and the grout lines.
To kill the mold, spray a 3 percent hydrogen peroxide solution directly onto the black spots. Let it sit for 30 minutes. Scrub with your brush and rinse. If the mold has penetrated the silicone caulking around the edge of the tub, you cannot clean it. You must cut the old caulking out with a utility knife, clean the gap with rubbing alcohol, and apply a fresh bead of mold-resistant 100 percent silicone.
Sealing Grout for Long-Term Protection
Once you spend the time scrubbing your grout clean, you must protect it. You need to apply a penetrating grout sealer.
Wait 24 hours after cleaning to ensure the grout is completely dry inside. Buy a silicone-based penetrating sealer. Use a small applicator brush to paint the sealer directly onto the grout lines. Wipe away any excess sealer that gets on the surrounding tiles within 5 minutes. The sealer sinks into the pores of the grout and hardens. This creates a waterproof barrier. Water and dirt will bead up on the surface of the grout instead of soaking in, making your future cleaning sessions incredibly fast. You should reapply this sealer once a year.
Maintaining Gleaming Shower Curtains and Liners
A plastic shower liner traps water in its folds. This creates a perfect environment for pink bacteria and black mold to grow along the bottom edge. You do not need to throw the liner away when it gets dirty. You can wash it easily.
Washing Machine Methods
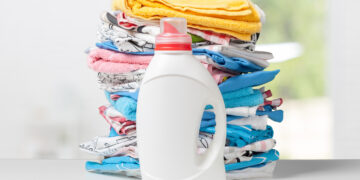
Take your plastic shower liner down from the hooks. Place it inside your washing machine. Add two regular bath towels to the load. The rough texture of the towels provides the physical friction needed to scrub the mold off the plastic during the wash cycle.
Add your normal amount of liquid laundry detergent. Set the machine to a warm water cycle, typically around 40 degrees Celsius. Do not use hot water, as it can melt or warp the thin plastic. Let the machine complete its full cycle.
Remove the liner from the washing machine immediately. Do not put it in the dryer. The heat of the dryer will destroy the plastic. Hang the wet liner straight back onto the shower rod. Spread it out completely flat so it can air dry. The liner will look brand new.
Daily Prevention Routines
You can prevent mold from growing on your shower liner by changing one simple habit. After you finish showering, pull the curtain completely closed across the length of the tub. When you push the curtain to one side, the plastic folds together tightly. The water gets trapped inside these folds and cannot evaporate. Pulling the curtain closed allows the air to circulate across the flat surface, drying the plastic quickly.
Tackling Hard Water Stains and Mineral Deposits
Hard water leaves crusty, white calcium deposits on your showerhead and your metal faucets. When these deposits build up inside the showerhead, they block the water flow and cause the water to spray in unpredictable directions.
You must use acetic acid to dissolve these minerals.
Fill a small, heavy-duty plastic bag with one cup of white vinegar. Lift the bag up and over your showerhead so that the entire metal fixture is completely submerged in the vinegar. Take a thick rubber band and wrap it tightly around the neck of the shower pipe to secure the bag in place.
Leave the bag attached for exactly 60 minutes. The acid will dissolve the calcium carbonate silently. After 60 minutes, remove the bag and pour the vinegar down the drain. Turn the shower on using hot water. The water pressure will blow the dissolved minerals out of the small holes. Take a microfiber cloth and wipe the exterior of the showerhead. The metal will shine perfectly.
You can use this same technique for the faucets in your sink. Soak a paper towel in pure white vinegar. Wrap the wet paper towel tightly around the base of the faucet where the hard water crust forms. Leave it for 30 minutes, remove the paper towel, and wipe the softened minerals away.
Managing Bathroom Moisture and Ventilation
All bathroom grime thrives on moisture. If your bathroom stays wet for hours after a shower, you will fight a constant battle against mold and mildew. Controlling the humidity in the room is the most effective cleaning strategy you can implement.
If you have an exhaust fan installed in your ceiling, you must use it correctly. Turn the fan on before you step into the shower. Leave the fan running for at least 20 minutes after you turn the water off. This pulls the dense, wet air out of the room. If you turn the fan off the moment you exit the bathroom, the moisture remains trapped inside.
If you do not have an exhaust fan, open the bathroom window by at least four inches while you shower. Leave the bathroom door open after you finish to allow the air conditioning or the natural airflow of the house to dry the room. Always hang your wet bath towels completely flat across a towel bar. Do not bunch them up on a small hook, as bunched towels stay damp and contribute to the humidity of the room.
Establishing a Routine for a Consistently Clean Bathroom
Deep cleaning requires significant effort. You can extend the time between deep cleans by adopting a simple, three-minute daily routine. Preventing dirt buildup is always easier than scrubbing it away later.
Buy a good quality squeegee and hang it inside the shower enclosure. Instruct everyone in your house to use the squeegee immediately after they finish showering. Starting from the top, pull the squeegee down the glass doors and the tiled walls. This process takes exactly 30 seconds. By removing the water immediately, you remove the calcium and the soap before they have a chance to dry and bond to the surface.
Once a week, spray a daily shower cleaner over the entire wet enclosure. You can make a highly effective daily spray by mixing one cup of water, half a cup of rubbing alcohol, and one tablespoon of liquid dish soap in a spray bottle. The alcohol helps the water evaporate extremely quickly, leaving no spots behind.
Final Thoughts
Maintaining a spotless bathroom does not require expensive, heavily perfumed chemicals or hours of exhausting manual labor. It requires a clear understanding of the right tools and the correct chemical reactions. You defeat soap scum with acidic solutions and steady friction. You restore porous grout using alkaline cleaners and a stiff V-shaped brush. You protect your glass and tiles by managing the moisture levels in the room and using a squeegee consistently.
Take action in your bathroom this week. Start with your showerhead. Fill a plastic bag with white vinegar, secure it over the fixture, and let the acid do the hard work for you. Once you see how easily the hard water crust dissolves, you will approach the rest of your bathroom cleaning routine with complete confidence and clear, proven techniques.
Tags:
bathroom deep cleaning, banishing soap scum, restoring grout, gleaming bathtubs, shower curtains, hard water stains, cleaning shower glass, remove mineral deposits
